How to add an Adjustable Breakaway Safety Chin Strap to Any Sun Hat
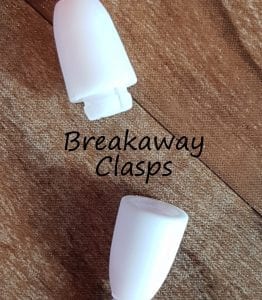
Cord locks are very useful for adjusting a strap or drawstring, but they can be dangerous, especially on something like a sun hat, where the chin strap could get caught on playground equipment and encircle the neck. To make a chin strap adjustable AND safe, you can add breakaway clasps, designed to break apart if pulled forcefully.
Here are the supplies that you will need to make an adjustable safety chin strap:
-Three pieces of ribbon, lace, or other thin drawstring material (thicker materials will not work, as it needs to compress small enough to pull through the clasp hole): 2 pieces 4" (10cm) long and one piece 15" (38cm) long. 3/8"-1/2" wide (1-1.3cm) is ideal as long as it is nice and thin.
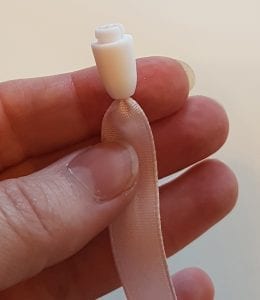
-2 sets of breakaway clasps, designed for children's breakaway necklaces (see photo below)
-1 two hole cord lock
-hand sewing needle and thread, and scissors


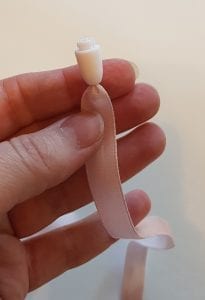
Start with the 15" piece of ribbon/drawstring. Take your hand sewing needle and anchor thread in one end of it as shown. Then pull it through the small end of one half of a breakaway clasp.

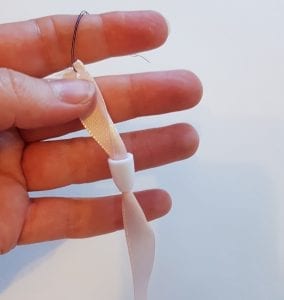
Next, make a knot in your ribbon/drawstring and trim off any extra past the knot. If it is prone to fraying, apply Fray Check (or Fray Stop, etc) or clear nail polish and wait for it to dry. Then pull the ribbon/drawstring so the knot goes inside the clasp.

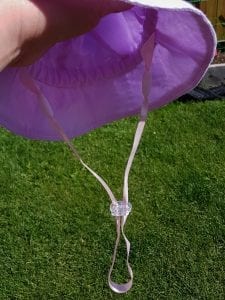
Next, take the other end of your 15" ribbon/drawstring and anchor another thread to it with a needle. Then guide it through one hole of your two hole cord lock and out the other hole.

Then attach half of the other breakaway clasp to the end in the same manner, pulling it through and tying a knot.
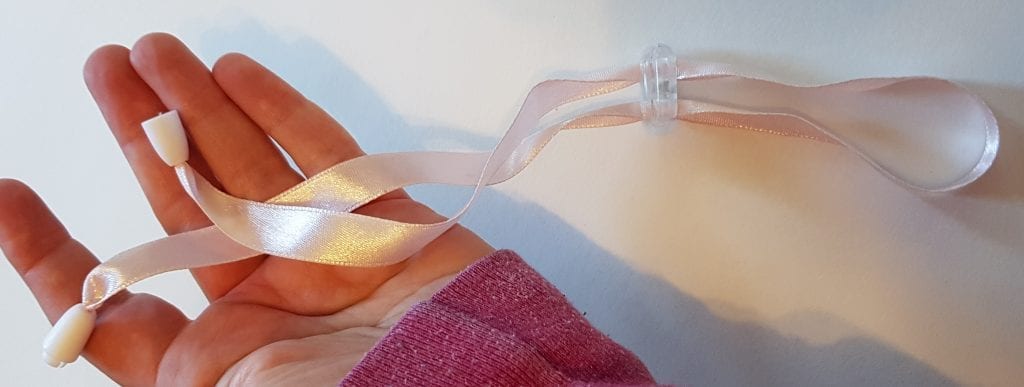
Next take each of the short pieces and attach the remaining breakaway clasps in the same way. Please note: the lengths of these pieces may end up measuring differently, due to where you tied the knot. Trim them so both pieces are approx 2" long in the part that shows, outside of the clasp.
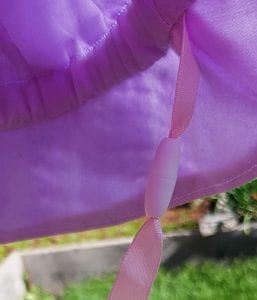
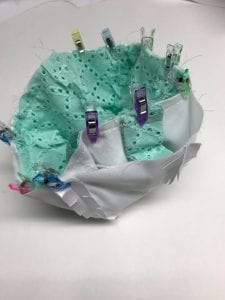
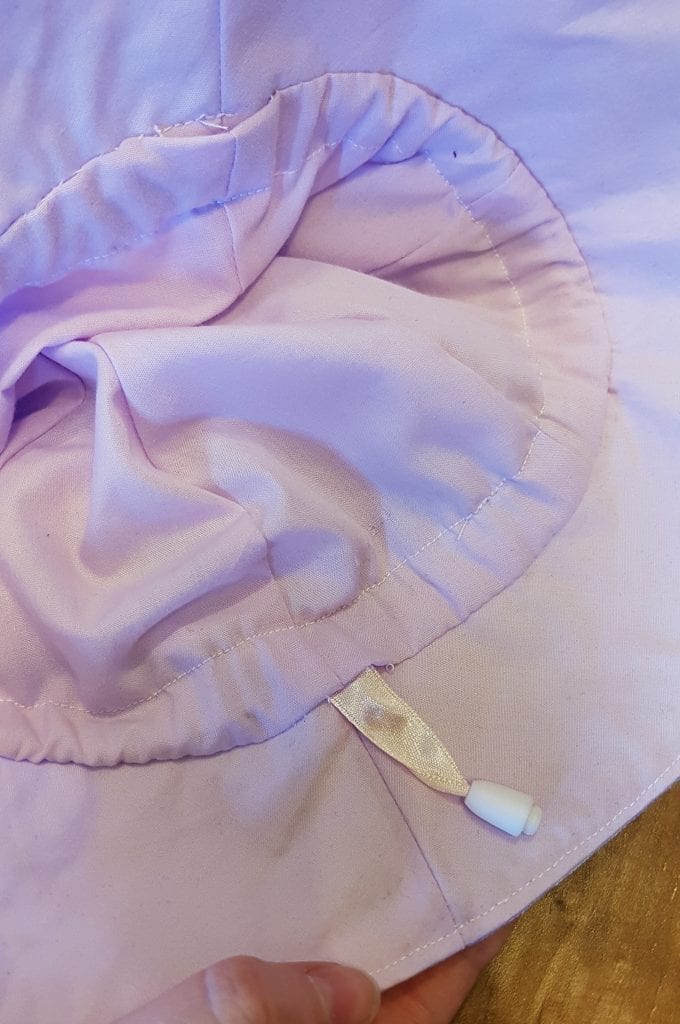
Now, if you are sewing a sun hat from scratch, all you need to do is sew the raw end of the two short pieces into the sides of the hat, between the brim and the top part of the hat. Shown here is the step from the Sunshine Coast Hat by Goober Pea Designs where you sandwich the straps between the brim and cap.
If you are adding the chin strap to an already finished hat, you can unpick the stitches on each side of the hat, then insert the raw end of the short pieces, and ladder stitch the gap shut, sewing your stitches through the ribbon/drawstring. Stitch back and forth over the gap several times to ensure it is strong and will not pull loose during use. If you are unfamiliar with the ladder stitch technique, please check out this YouTube video: https://www.youtube.com/watch?v=5CjOXMuTFXo
Snap the two halves of the clasps together, and you're done!! If you find the strap too long, it is very easy to shorten it - just pull the knot out of one of the clasps on the long portion, tie a knot further down, and then trim off the excess.
PLEASE NOTE: The strap is designed to prevent accidental strangulation while being worn, but it should still only be worn while supervised, as the separated parts of it are NOT safe for children to play with/put in their mouths. If it does come apart (this is unlikely - most brands of clasp are strong enough to prevent a baby from pulling it apart themselves - but still possible) it should be immediately put back together or put away out of reach of children.