How to Blend Sizes: Shortening & Lengthening
Here at Goober Pea Designs, we recognize that kids come in all different shapes and sizes, and we strongly encourage blending sizes to get the perfect fit! My own kids typically fall into different sizes for height and width, so I've had plenty of experience testing these techniques and figuring out the easiest and/or most accurate ways to do it.
There are two main methods that I usually recommend. In this post I'm going to cover the shortening/lengthening method, where the main size is chosen by width, and then the pieces are shortened or lengthened as needed through the body and arm, without touching the armscyes or sleeve caps.
This method generally works well for loose fitting garments, and for more fitted garments where the chest size is bigger than the height size. If the height size is bigger, I recommend using a different blending method that will also add height to the armscye.
Step 1 - Choosing the Main Size
When using this method for tops and dresses, the main size will be chosen by the CHEST WIDTH. So you'll want to measure the chest circumference, find the size that matches that measurement (on the pattern size chart), and then print off the pattern pieces in that size.
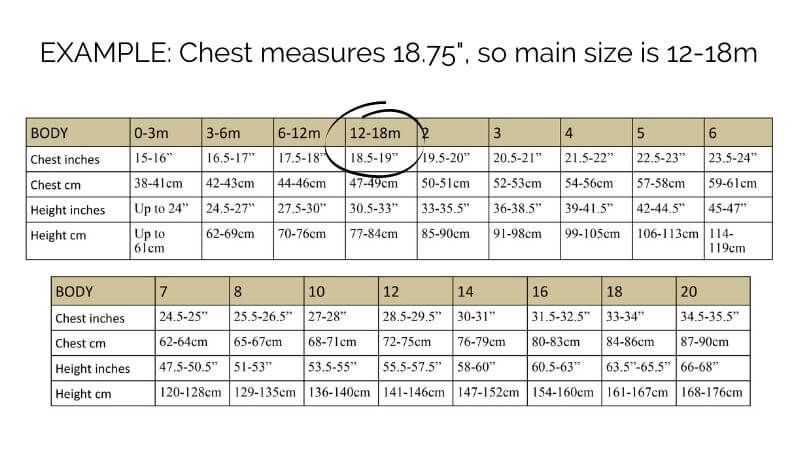
NOTE - if your pattern does not have a finished measurements chart, you will also need to print off the height size so you can measure and determine the difference in length.
Step 2 - Determine How Much to Shorten or Lengthen
Next you need to determine the height size, and figure out how much it differs in length from your main size.
Measure the child's full height, and find the size that matches that measurement on the pattern size chart.
Now, if your pattern has a Finished Measurements Chart, you can simply look up the finished length for your main size, the finished length for the height size, and calculate the difference.
EXAMPLE #1:
Main size 12-18m, finished length of body 15"
Height size 6-12m, finished length of body 14"
The difference is 1", and the height size is SHORTER than your main size, which means you need to SHORTEN the body pieces by 1".
EXAMPLE #2:
Main size 12-18m, finished length of body 15"
Height size 2T, finished length of body 16"
The difference is 1", and the height size is LONGER than your main size, which means you need to LENGTHEN the body pieces by 1".
NOTE: If the pattern does not have a finished measurements chart, then as mentioned previously, you'll need to print the height size. Measure the full length of the height size piece, and compare it to the length of the main size piece. The difference is the amount that you need to add/remove from the main size.
Step 3 - Draw a Horizontal line on Each Piece
Some patterns will have a shortening/lengthening line already marked (most often adult patterns with curvy sides). Most children's patterns have a fairly straight side seam, and can be shortened/lengthened just about anywhere between the armscye and bottom hem.
In fact, if the side seams are completely straight, you can simply add/deduct from the bottom, as shown below.
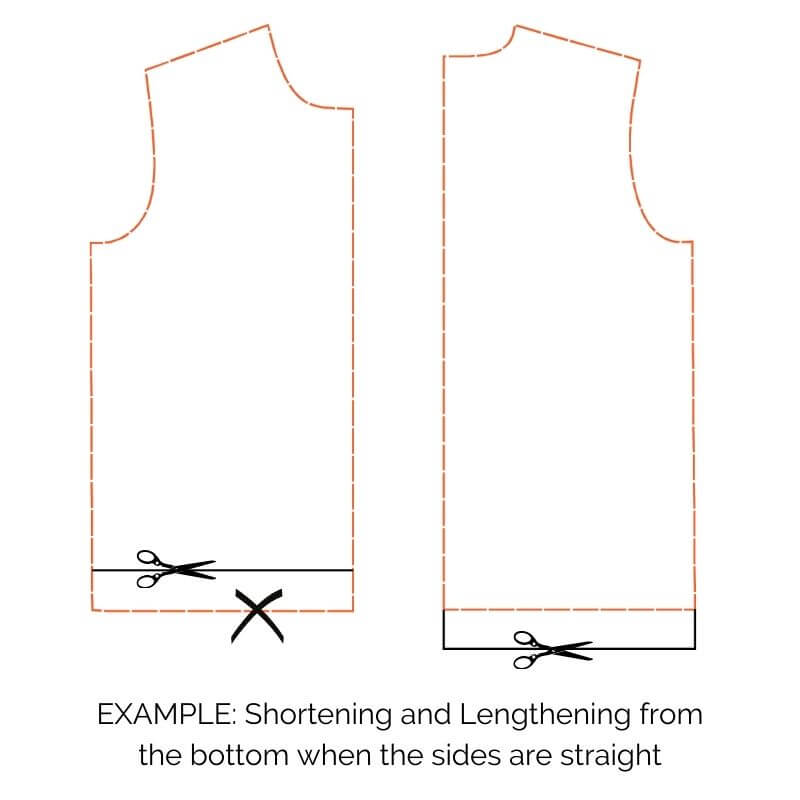
But if the side seam is not straight, draw a horizontal line in the middle somewhere, perpendicular to the grain line. Make sure this line is at the same level for front and back pieces.
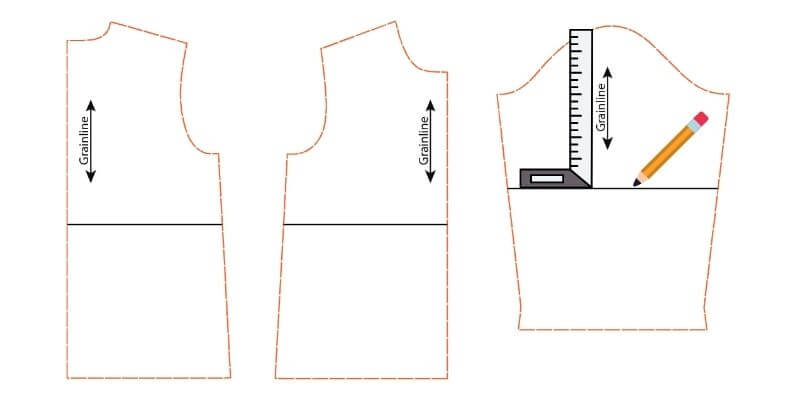
Step 4 - Cut on Your Shorten/Lengthen Line
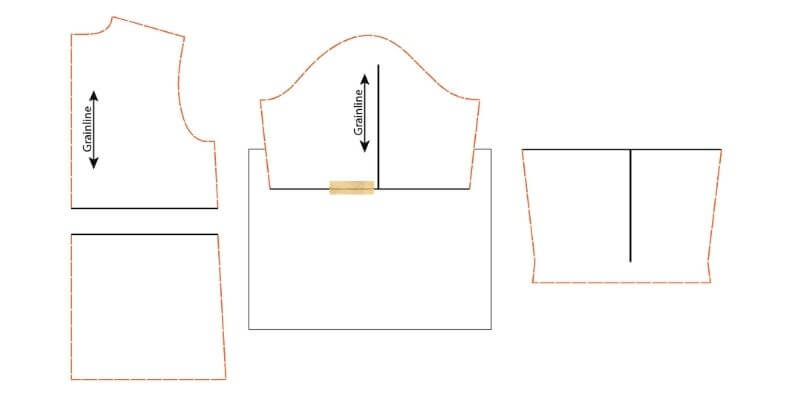
BEFORE YOU CUT: Make sure there is a vertical line (the grain line or a line parallel to the grain line) somewhere on your piece that goes above and below your horizontal line. If you assembled your pieces from home printer pages, more than likely there will be a grid line you can use, but if not, you will need to draw one.
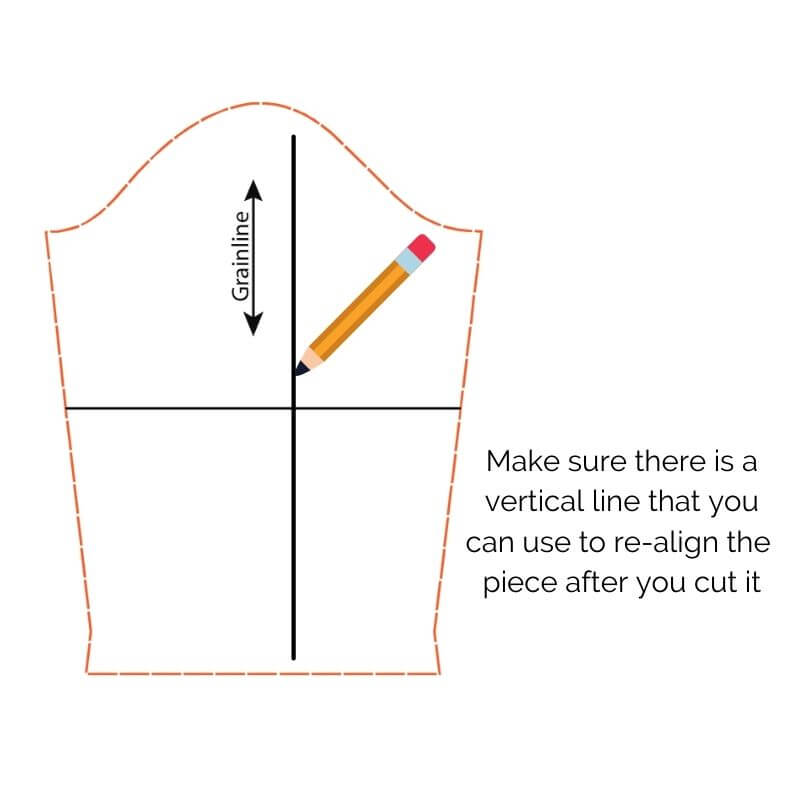
Cut along the line and separate the piece into two halves. If you are lengthening, tape your top half onto a separate piece of paper.
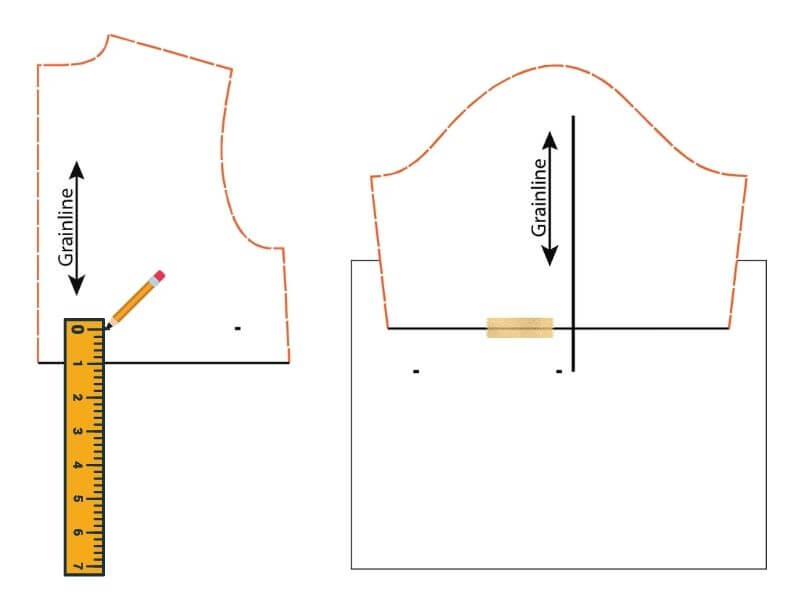
Step 5 - Using a Ruler, Mark the Distance you are Adding/Removing
If you are removing length (below left example), measure up from the cut on the top half.
If you are adding length (below right example), measure down from the cut on the additional piece of paper. Using a ruler, extend vertical lines down onto the extra paper.
Make your marks in two places so it will be even.
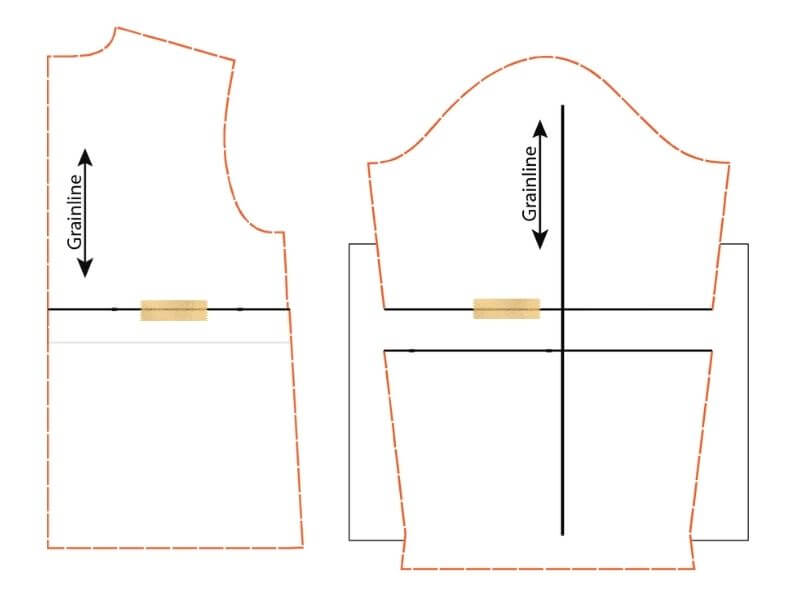
Step 5 - Tape the Lower Piece in Place
If you are removing length (below left example), overlap the lower piece onto the top piece at the marks, making sure to keep all vertical lines aligned. Then tape it in place.
If you are adding length (below right example), align the top of the lower piece with the marks you made on the extra paper. Make sure all vertical lines are aligned, and then tape it in place.
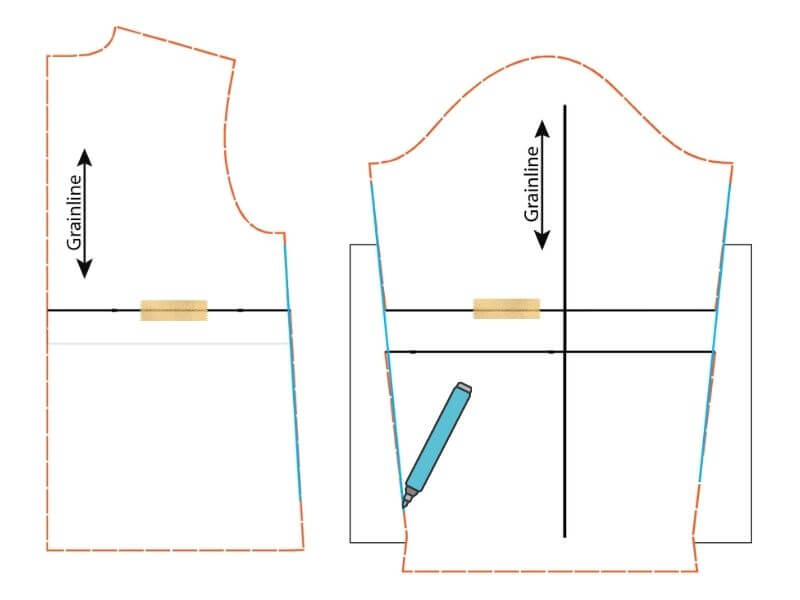
Step 6 - Smooth Your Side Seams
Unless your side seams are perfectly straight, the lines will now be a bit uneven. Smooth them out, as shown below.
That's it - all done!
Now your adjusted pieces are complete.
The examples shown are for basic bodice pieces and sleeves. I should note that this process becomes a bit more complex when you add in additional pieces, such as color blocked seams, princess seams, pockets, etc.
A few general tips for more complex garments:
- If there are horizontal seams dividing your bodice at any point below the armscye, you will need to shorten/lengthen each piece proportionately. For example, if there is a waist seam dividing the item approximately in half, remove half the length from the piece above the waist, and half from the piece below the waist.
- For pieces that do not have a center front/center back (such as the side piece on a princess seamed top or dress), make extra sure there is a vertical line that runs through the shorten/lengthen line, which you can use to properly align the piece after adjustments.
- Pockets can often be left alone, unless shortening the bodice will make the pocket stick out the bottom, or the pocket length will be too short for the recipients hands. In that case, try to shorten/lengthen the pocket in the same location as the bodice.